docer私有仓库搭建
环境:centos7.4 docker
- 服务端
1、安装docker服务
[root@docker-hub ~]# yum -y install docker
2、启动docker
[root@docker-hub ~]# systemctl start docker && systemctl enable docker
3、下载私有仓库镜像
[root@docker-hub ~]# docker pull registry
4、创建仓库容器
[root@docker-hub ~]# docker run -d --name docker-hub -p 5000:5000 -v /opt/registry/:/var/lib/registry registry
5、查看端口
[root@localhost ~]# netstat -antup |grep 5000
tcp6 0 0 :::5000 :::* LISTEN 8778/docker-proxy-c
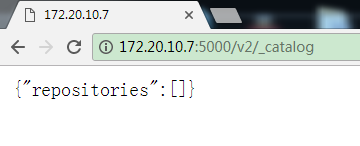
6、测试(看到以下页面说明成功)
- 客户端
1、安装docker服务
[root@localhost ~]# yum -y install docker
2、修改配置
[root@localhost ~]# vim /etc/sysconfig/docker        #添加红色部分
OPTIONS='--selinux-enabled --log-driver=journald --signature-verification=false --insecure-registry 172.20.10.7:5000'
3、启动docker
[root@localhost ~]# systemctl start docker && systemctl enable docker
4、测试
- 下载一个镜像
[root@localhost ~]# docker pull busybox
- 打包镜像
语法:docker tag <镜像:标签> <仓库地址:端口/镜像:标签>
[root@localhost ~]# docker tag docker.io/busybox:latest 172.20.10.7:5000/busybox:latest
- 查看镜像
[root@localhost ~]# docker images
REPOSITORY TAG IMAGE ID CREATED SIZE
172.20.10.7:5000/busybox latest 8c811b4aec35 7 weeks ago 1.15 MB
docker.io/busybox latest 8c811b4aec35 7 weeks ago 1.15 MB
- 上传镜像
语法:docker push <仓库地址:端口/镜像:标签>
[root@localhost ~]# docker push 172.20.10.7:5000/busybox
- 下载镜像
[root@localhost ~]# docker pull 172.20.10.7:5000/busybox
- 服务端查看
[root@localhost ~]# tree /opt/registry/ |grep busybox
 └── busybox

已成功
温馨提示:如无特殊说明,本站文章均为作者原创,转载请注明出处!