源码安装LNMP
环境:Centos 7.4 Nginx 1.14.1 Mysql 5.7 PHP 7.0
1、安装软件依赖包
[root@localhost ~]# yum install -y gcc* libmcrypt-devel bzip2-devel gcc openssl-devel php-mcrypt libmcrypt libxml2-devel libjpeg-devel libpng-devel freetype-devel cmake gcc-c++ ncurses-devel perl-Data-Dumper boost boost-doc boost-devel pcre-devel
[root@localhost ~]# yum -y groupinstall "Development Tools" "Server Platform Deveopment"
[root@localhost ~]# cd /usr/local/src
[root@localhost src]# wget http://nginx.org/download/nginx-1.14.1.tar.gz
[root@localhost src]# wget https://dev.mysql.com/get/Downloads/MySQL-5.7/mysql-boost-5.7.20.tar.gz
[root@localhost src]# wget https://dev.mysql.com/get/Downloads/MySQL-5.7/mysql-5.7.20.tar.gz
[root@localhost src]# wget http://cn.php.net/distributions/php-7.0.32.tar.gz
[root@localhost src]# useradd -M -s /sbin/nologin nginx #创建Nginx用户
[root@localhost src]# tar -xvf nginx-1.14.1.tar.gz
[root@localhost src]# cd nginx-1.14.1/
[root@localhost nginx-1.14.1]# ./configure --prefix=/usr/local/nginx --user=nginx --group=nginx --with-http_ssl_module --with-http_flv_module --with-http_stub_status_module --with-http_gzip_static_module --with-pcre
[root@localhost nginx-1.14.1]# make && make install
注:

--prefix:Nginx安装目录
--user:Nginx用户
--group:Nginx用户所属组
--with-http_ssl_module:提供https支持
--with-http_flv_module:搭建flv视频服务器使用的
--with-http_stub_status_module:开启Stub Status模块,该模块会产生一个服务器状态和信息页
--with-http_gzip_static_module:开启Gzip静态模块,该模块用于发送预压缩文件
--with-pcre:perl执行文件路径
[root@localhost ~]# vim /usr/lib/systemd/system/nginx.service
 [Unit]
 Description=The nginx HTTP and reverse proxy server
 After=network.target remote-fs.target nss-lookup.target

[Service]
 Type=forking
 PIDFile=/usr/local/nginx/logs/nginx.pid
 ExecStartPre=/usr/bin/rm -f /run/nginx.pid
 ExecStartPre=/usr/local/nginx/sbin/nginx -t
 ExecStart=/usr/local/nginx/sbin/nginx
 ExecReload=/bin/kill -s HUP $MAINPID
 KillMode=process
 KillSignal=SIGQUIT
 TimeoutStopSec=5
 PrivateTmp=true

[Install]
 WantedBy=multi-user.target
[root@localhost ~]# chmod +x /usr/lib/systemd/system/nginx.service
5、启动服务

[root@localhost ~]# /usr/local/nginx/sbin/nginx -t
nginx: the configuration file /usr/local/nginx/conf/nginx.conf syntax is ok
nginx: configuration file /usr/local/nginx/conf/nginx.conf test is successful
[root@localhost ~]# systemctl start nginx
[root@localhost ~]# systemctl enable nginx
[root@localhost ~] netstat -antup |grep 80
tcp 0 0 0.0.0.0:80 0.0.0.0:* LISTEN 21569/nginx: master
6、测试  7、安装Mysql
[root@localhost ~]# cd /usr/local/src
[root@localhost src]# tar -xvf mysql-boost-5.7.20.tar.gz
[root@localhost src]# tar -xvf mysql-5.7.20.tar.gz
[root@localhost src]# cd cd mysql-5.7.20/
[root@localhost src]# useradd -M -s /sbin/nologin mysql
[root@localhost src]# mkdir -p /usr/local/mysql/data
[root@localhost src]# mkdir -p /usr/local/mysql/conf
[root@localhost src]# chown -R mysql:mysql /usr/local/mysql
[root@localhost src]# mv /etc/my.cnf /etc/my.cnf.bak #作备份
[root@localhost src]# cd mysql-5.7.20
[root@localhost mysql-5.7.20]# cmake -DCMAKE_INSTALL_PREFIX=/usr/local/mysql -DMYSQL_DATADIR=/usr/local/mysql/data -DSYSCONFDIR=/usr/local/mysql/conf -DMYSQL_USER=mysql -DWITH_MYISAM_STORAGE_ENGINE=1 -DWITH_INNOBASE_STORAGE_ENGINE=1 -DMYSQL_UNIX_ADDR=/usr/local/mysql/mysql.sock -DMYSQL_TCP_PORT=3306 -DEXTRA_CHARSETS=all -DDEFAULT_CHARSET=utf8 -DDEFAULT_COLLATION=utf8_general_ci -DWITH_DEBUG=0 -DMYSQL_MAINTAINER_MODE=0 -DWITH_SSL:STRING=bundled -DWITH_ZLIB:STRING=bundled -DDOWNLOAD_BOOST=1 -DWITH_BOOST=./boost
注: 内存不足2G会编译失败
[root@localhost mysql-5.7.20]# make && make install
注:

-DCMAKE_INSTALL_PREFIX=/usr/local/mysql 设置安装目录
-DMYSQL_DATADIR=/usr/local/mysql/mydata 设置数据库存放目录
-DMYSQL_UNIX_ADDR=/usr/local/mysql/mysql.sock 设置UNIX socket 目录
-DMYSQL_USER=mysql 设置运行用户
-DDEFAULT_CHARSET=utf8 设置默认字符集,默认latin1
-DEFAULT_COLLATION=utf8_general_ci 设置默认校对规则,默认latin1_general_ci
-DWITH_INNOBASE_STORAGE_ENGINE=1 添加InnoDB引擎支持
-DENABLE_DOWNLOADS=1 自动下载可选文件,比如自动下载谷歌的测试包
-DMYSQL_TCP_PORT=3306 设置服务器监听端口,默认3306
-DSYSCONFDIR=/usr/local/mysql/conf 设置my.cnf所在目录,默认为安装目录
更多参数 # cmake . -LH
8、初始化MySQL(红色为初始化后的密码)
[root@localhost ~]# /usr/local/mysql/bin/mysqld --initialize --user=mysql --basedir=/usr/local/mysql --datadir=/usr/local/mysql/data
2018-11-12T08:01:40.441629Z 0 [Warning] TIMESTAMP with implicit DEFAULT value is deprecated. Please use --explicit_defaults_for_timestamp server option (see documentation for more details).
2018-11-12T08:01:41.508324Z 0 [Warning] InnoDB: New log files created, LSN=45790
2018-11-12T08:01:41.632181Z 0 [Warning] InnoDB: Creating foreign key constraint system tables.
2018-11-12T08:01:41.700561Z 0 [Warning] No existing UUID has been found, so we assume that this is the first time that this server has been started. Generating a new UUID: 309b05ce-e651-11e8-a04d-00163e050fa5.
2018-11-12T08:01:41.702653Z 0 [Warning] Gtid table is not ready to be used. Table 'mysql.gtid_executed' cannot be opened.
2018-11-12T08:01:41.703132Z 1 [Note] A temporary password is generated for root@localhost: 6>ZjLUQ;Xog,
9、配置my.cnf
[root@localhost ~]# cp /etc/my.cnf.bak /usr/local/mysql/conf/my.cnf
[root@localhost ~]# vim /usr/local/mysql/conf/my.cnf
[mysqld]
datadir=/usr/local/mysql/data #数据库目录
socket=/usr/local/mysql/mysql.sock #socket 目录路径
symbolic-links=0
[mysqld_safe]
log-error=/var/log/mysql/mysql.err #错误日志路径
pid-file=/usr/local/mysql/data/mysql.pid  #pid路径
!includedir /etc/my.cnf.d
10、配置启动脚本
[root@localhost ~]# vim /usr/lib/systemd/system/mysql.service
 [Unit]
 Description=MariaDB server and services
 After=syslog.target
 After=network.target

[Service]
 Type=simple
 User=mysql
 Group=mysql
 ExecStart=/usr/local/mysql/bin/mysqld_safe --basedir=/usr/local/mysql
 TimeoutSec=300
 PrivateTmp=false

[Install]
 WantedBy=multi-user.target

[root@localhost ~]# chmod +x /usr/lib/systemd/system/mysql.service
[root@localhost ~]# systemctl start mysql.service
[root@localhost ~]# systemctl enable mysql.service
[root@localhost ~]# netstat -antup |grep 3306
tcp6 0 0 :::3306 :::* LISTEN 23144/mysqld
[root@localhost ~]# cd /usr/local/src
[root@localhost src]# tar xvf php-7.0.32.tar.gz
[root@localhost src]# useradd -M -s /sbin/nologin php
[root@localhost src]# cd php-7.0.32
[root@localhost php-7.0.32]# ./configure --prefix=/usr/local/php --with-config-file-scan-dir=/usr/local/php/etc/ --with-mysql=mysqlnd --with-pdo-mysql=mysqlnd --with-mysqli=mysqlnd --with-openssl --enable-mbstring --with-freetype-dir --with-jpeg-dir --with-png-dir --with-zlib --with-libxml-dir=/usr --enable-xml --enable-sockets --with-mcrypt --with-bz2 --enable-fpm --with-gd --enable-bcmath
[root@localhost php-7.0.32]# make && make install
#模块说明:

--prefix:php安装目录
--with-config-file-scan-dir:php配置文件
--with-mysql:mysql安装目录,对mysql的支持
--with-pdo-mysql:指定 MySQL 数据库的安装目录位置
--with-mysqli:mysqli扩展技术不仅可以调用MySQL的存储过程、处理MySQL事务,而且还可以使访问数据库工作变得更加稳定。
--with-openssl:openssl的支持,加密传输时用到的
--enable-mbstring:多字节,字符串的支持
--with-freetype-dir:打开对freetype字体库的支持
--with-jpeg-dir:打开对jpeg图片的支持
--with-png-dir:打开对png图片的支持
--with-zlib:打开zlib库的支持
--with-libxml-dir:打开libxml2库的支持
--enable-sockets:打开 sockets 支持
--with-mcrypt:算法
--with-bz2:打开对bz2文件的支持
--enable-fpm:打上PHP-fpm 补丁后才有这个参数,CGI方式安装的启动程序
--with-gd:打开gd库的支持
--enable-bcmath:打开图片大小调整,用到zabbix监控的时候用到了这个模块
[root@localhost ~]# cp /usr/local/src/php-7.0.32/php.ini-production /usr/local/php/etc/php.ini
[root@localhost ~]# mv /usr/local/php/etc/php-fpm.d/www.conf.default /usr/local/php/etc/php-fpm.d/www.conf
[root@localhost ~]# cp /usr/local/php/etc/php-fpm.conf.default /usr/local/php/etc/php-fpm.conf
[root@localhost ~]# sed -i -e 's@;pid = run/php-fpm.pid@pid = run/php-fpm.pid@g' -e 's@nobody@php@g' -e 's@;error_log = log/php-fpm.log@error_log = log/php-fpm.log@g' -e 's@;daemonize = yes@daemonize = no@g' /usr/local/php/etc/php-fpm.conf
[root@localhost ~]# cp /usr/local/src/php-7.0.32/sapi/fpm/php-fpm.service /usr/lib/systemd/system/php-fpm.service
[root@localhost ~]# /usr/local/php/sbin/php-fpm -t
[root@localhost ~]# systemctl start php-fpm.server
[root@localhost ~]# systemctl enable php-fpm.server
[root@localhost ~]# netstat -antup |grep 9000
tcp 0 0 127.0.0.1:9000 0.0.0.0:* LISTEN 23497/php-fpm: mast
[root@localhost ~]# vim /usr/local/nginx/conf/nginx.conf
location / {
root html; index index.html index.htm index.php;
}
location ~ \.php$ {
root html;
fastcgi_pass 127.0.0.1:9000;
fastcgi_index index.php;
fastcgi_param SCRIPT_FILENAME $document_root$fastcgi_script_name;
include fastcgi_params;
}
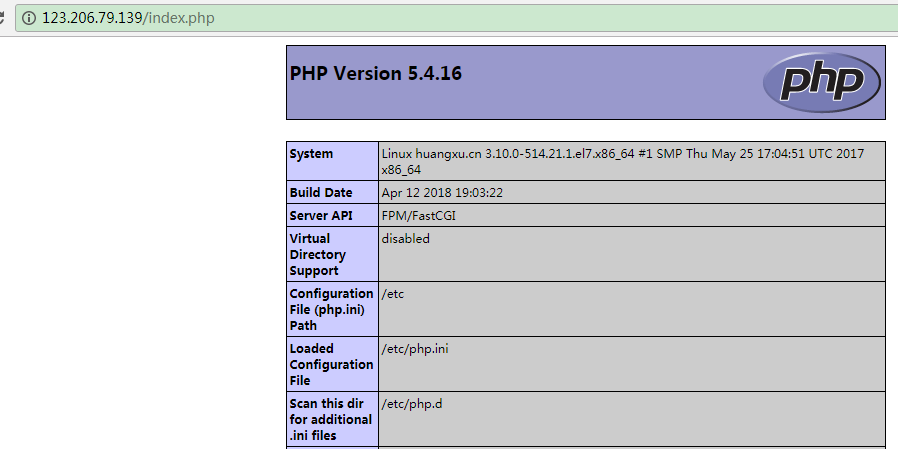
[root@localhost ~]# vim /usr/local/nginx/html/index.php
<?php
phpinfo();
?>
[root@localhost ~]# systemctl restart nginx
温馨提示:如无特殊说明,本站文章均为作者原创,转载请注明出处!